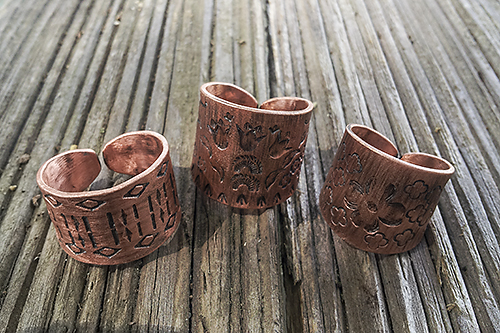
This copper ring project is easy and fun to make. You will use basic metalsmithing techniques like sawing, filing, stamping, sanding, and forming.
You will need a piece of 18 or 20 gauge copper sheet metal, that’s about 1 mm thick. To get the size you need, cut a strip of paper the same width that you’d like to wear. Wrap it around your finger and mark it with a pencil. Make adjustments to the paper until you have the right size of the ring. When you are done, you will have a paper model for your ring. Through this process, you will notice that once you’ve cut the paper, you can’t add the cut scraps to it. Copper is the same way, so when you are ready to start on the copper, you can make it a mm or so longer to allow for error. It is always easier to remove a little extra than it is to start over from scratch! Don’t fuss over this step too much. This ring will be open at the back, so you don’t have to worry about getting the size exactly right.
Here is how I make these rings in my studio:

I cut strips the width I want, and then I choose my lengths. Most rings are between 50 and 70 mm long:

I cut the strips of copper sheet on the shear.

Then, it’s time to taper the ends to make them comfortable to wear. I use a sharpy to mark the center points of the rings, and I use this to mark the outside dimensions of the ring blanks. Sometimes, I just eyeball it, like I’m doing in this picture. You can use hand shears or a jeweler’s saw to do this part, too.
 The next step is to refine the ring blank by filing and sanding.

The ring is now ready to stamp a design onto it. Here, in this picture, I’m striking a stamping tool onto the surface of the copper. This will leave an impression on the ring. Use whatever steel marking stamps you have to assemble your overall design like a collage. There is no way to erase, however! You can add more stamped impressions, but not take any away.

This photo shows an example of the intricate designs you can create with simple stamping tools! This piece of copper is now ready to be bent into a ring.

To bend the ring, you will need a rawhide or wooden mallet, and steel mandrel, and a grooved wooden block. Here, I’m using a carved tree stump. My rawhide mallet is on the right, and the copper is beginning to wrap around the steel mandrel.

You will be sandwiching the copper in between the steel and the wood using the mallet.

Next, you will need to sand the ring and soften all the edges. work in parallel strokes so that the ring has a brushed finish. Once you are satisfied with your sanding work, you can add a black patina. Liver of sulfur works well. Heat the rings up on an electric hot plate set on low. Drop the rings in the liver of sulfur solution prepared according the the directions it came with. You want a medium yellow liquid that smells like rotten eggs. When the rings turn black, take them out to dry.

The final step is to lightly sand the rings to remove the black patina from the ring except in the stamped impressions. This accentuates your design. Following that, you can give your ring a protective coat of wax, such as turtle wax, to prevent tarnish. You can also let it develop its own patina.


